Virtualmin is a web-hosting tool used for hosting websites, web applications, mail-boxes, and databases. Virtualmin has lots of advantages in the web hosting field. Some of them are highlighted below:
- Virtualmin is open-source!
- Virtualmin ships with advanced features needed for web hosting such as antivirus and spam filtering mechanisms for mail-boxes.
- Virtualmin allows multiple domain hosting using virtualhosts.
- It comes with a monitoring dashboard where you can monitor the resources of your server.
- Easy to install.
As you can see, there are lots of advantages that come with Virtualmin and this makes it enterprise-class as it compares with some of the paid packages such as cPanel.
Virtualmin ships with two major packages, Webmin and Virtualmin.
Webmin is a frontend server management tool where system administrators can manage and monitor their server from a web interface.
Virtualmin is the web-panel front end for virtualhost management where you can create and manage the virtualhosts in an environment where you want to host multiple websites.
Download and Install Virtualmin on Rocky Linux 8
In this article, we shall demonstrate how to setup Virtualmin on Rocky Linux 8. Let’s dive right in!
Step 1. Update Rocky Linux system
It is always good practice to make sure that your system and packages are up to date.
sudo dnf update
Reboot your system for the changes to take effect:
sudo shutdown -r now
Also make sure that your server has a resolvable hostname or FQDN. If not, set the hostname as below:
sudo hostnamectl set-hostname
Step 2. Download Virtualmin install script
Download the script needed for Virtualmin installation
sudo dnf -y install wgetwget https://raw.githubusercontent.com/virtualmin/virtualmin-install/master/virtualmin-install.sh
Step 3. Install Virtualmin on Rocky Linux 8s
Make the downloaded script with the command below:
chmod a+x virtualmin-install.sh
Run the script with sudo permissions;
sudo ./virtualmin-install.sh
The script launches with the message below:
Welcome to the Virtualmin GPL installer, version 7.0.0-beta3 This script must be run on a freshly installed supported OS. It does not perform updates or upgrades (use your system package manager) or license changes (use the "virtualmin change-license" command). The systems currently supported by install.sh are: CentOS/RHEL Linux 7 and 8 on x86_64 Rocky and Alma Linux 8 on x86_64 Ubuntu 20.04 LTS on i386 and amd64 Debian 10 and 11 on i386 and amd64 If your OS/version/arch is not listed, installation will fail. More details about the systems supported by the script can be found here:
Agree to the installation prompt for the installation to start:
License details can be changed using virtualmin change-license command. Changing the license never requires re-installation. Updates and upgrades must be performed from within either Virtualmin or using system package manager on the command line. Really Continue? (y/n) y[INFO] Started installation log in /root/virtualmin-install.log▣□□ Phase 1 of 3: Setup [ ✔ ]Downloading virtualmin-release-latest.noarch.rpm [ ✔ ]Installing virtualmin-release package [ ✔ ]......
The installation process will take a few minutes before it completes. This depends on the internet speed of the server.
▣▣□ Phase 2 of 3: InstallationInstalling EPEL release package [ OK! ]Enabling PowerTools package repository [ OK! ]Installing dependencies and system packages [ OK! ]Installing Virtualmin and all related packages [ OK! ]Cleaning up software repo metadata [ OK! ]Installing updates to Virtualmin-related packages [ OK! ]
A successful installation will exit the shell with the message below:
▣▣▣ Phase 3 of 3: Configurationperl: warning: Falling back to a fallback locale ("en_US.UTF-8").[1/23] ]
Configuring AWStats    [  ✔  ][2/23] ]
Configuring Apache    [  ✔  ][3/23] ]
Configuring Bind       [  ✔  ][4/23] ]
Configuring ClamAV    [  ✔  ][5/23] ]
Configuring Dovecot    [  ✔  ][6/23] ]
Configuring Firewalld    [  ✔  ][7/23] ]
Configuring MySQL        [  ✔  ][8/23] ]
Configuring NTP        [  ✔  ][9/23] ]
Configuring Net        [  ✔  ][10/23] ]
Configuring ProFTPd      [  ✔  ][11/23] ]
Configuring Procmail    [  ✔  ][12/23] ]
Configuring Quotas[13/23] ]
Configuring SASL        [  ✔  ][14/23] ]
Configuring Shells    [  ✔  ][15/23] ]
Configuring SpamAssassin      [  ✔  ][16/23] ]
Configuring Status    [  ✔  ][17/23] ]
Configuring Upgrade      [  ✔  ][18/23] ]
Configuring Usermin      [  ✔  ][19/23] ]
Configuring Webalizer       [  ✔  ][20/23] ]
Configuring Webmin    [  ✔  ][21/23] ]
Configuring Fail2banFirewalld        [  ✔  ][22/23] ]
Configuring Postfix      [  ✔  ][23/23] ]
Configuring Virtualmin      [  ✔  ]▣▣▣ Cleaning up[SUCCESS] Installation Complete![SUCCESS] If there were no errors above, Virtualmin should be ready[SUCCESS] to configure at https://webhost.techviewleo.com:10000 (or https://192.168.100.114:10000).[SUCCESS] You may receive a security warning in your browser on your first visit.
You can now access the web interface with the details shown above.
Step 4. Allow Virtualmin through the Firewall
We need to allow Virtualmin service through the firewall for us to be able to access it on the web interface.
sudo firewall-cmd --zone=public --add-port=10000/tcp --permanentsudo firewall-cmd --reload
Configure Virtualmin on Rocky Linux 8
The next steps are for us to finish the installation of Virtualmin from theweb interface. Manage your server via https://:10000.
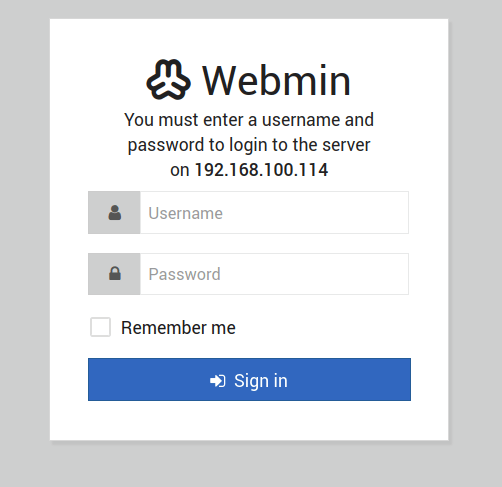
Provide the login details as below:
username: rootpassword: root-user-password-for-the-virtualmin-server
If you don’t remember root user password you can reset it.
$ sudo passwd rootChanging password for user root.New password: Retype new password: passwd: all authentication tokens updated successfully.
Then input the credentials to login.
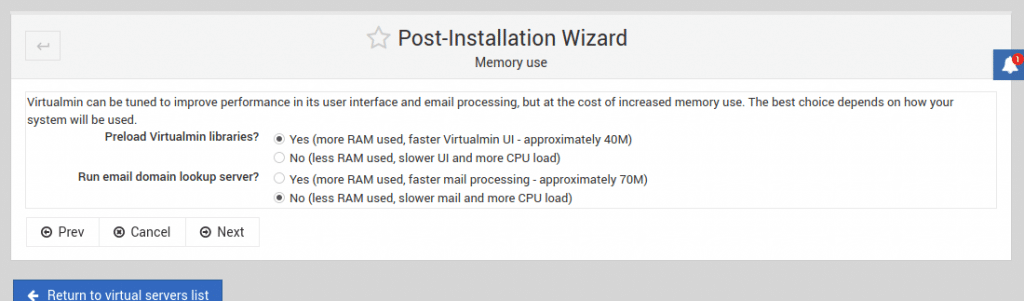
Use the post-installation wizard to finish up the installation of Virtualmin.
Click “Next” to start the web installation wizard.
Select “Yes” for preload Virtualmin libraries and “No” for email domain lookup, If you are not interested in that feature.
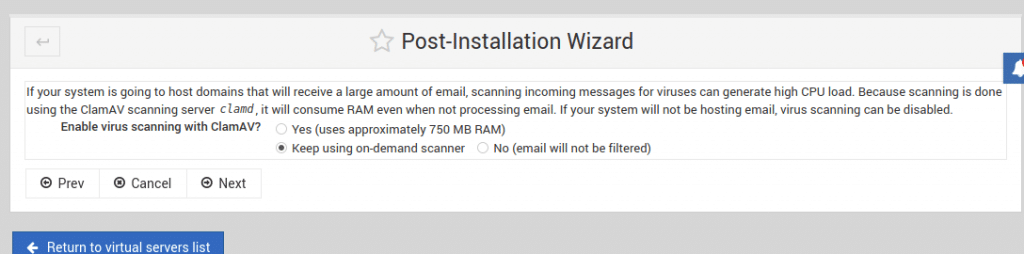
Choose to enable or disable ClamAV antivirus depending on your needs and resources. In this article, we won’t be installing that.
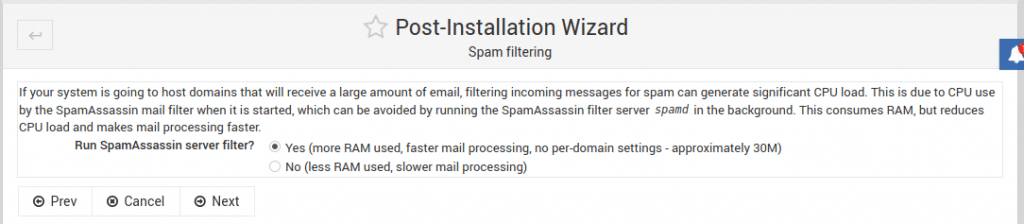
Enable spam filtering using SpamAssasin.
Choose a database of your choice
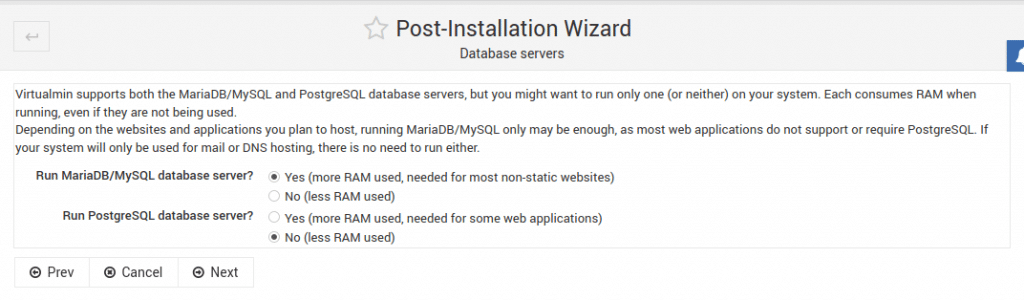
I will use MariaDB/MySQL for this demonstration. The next bit will be to setup MySQL root password, use a strong password and make sure you have it in a secure place so you don’t forget it.

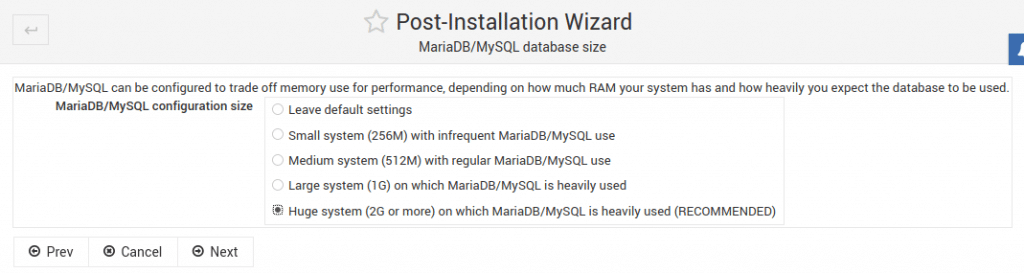
Choose the size of the database, this depends on the workloads you intend to run on the server and the available resources to handle the size of the database.
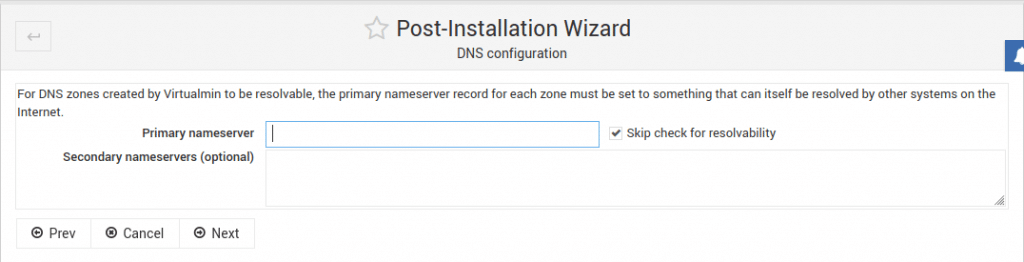
Configure primary and secondary nameservers for domain name resolution.
Click “Finish” to complete your installation. This will redirect you to the Virtualmin web dashboard.

You can use the Virtualmin tab to manage your hosting environments such as creating domains and subdomains.
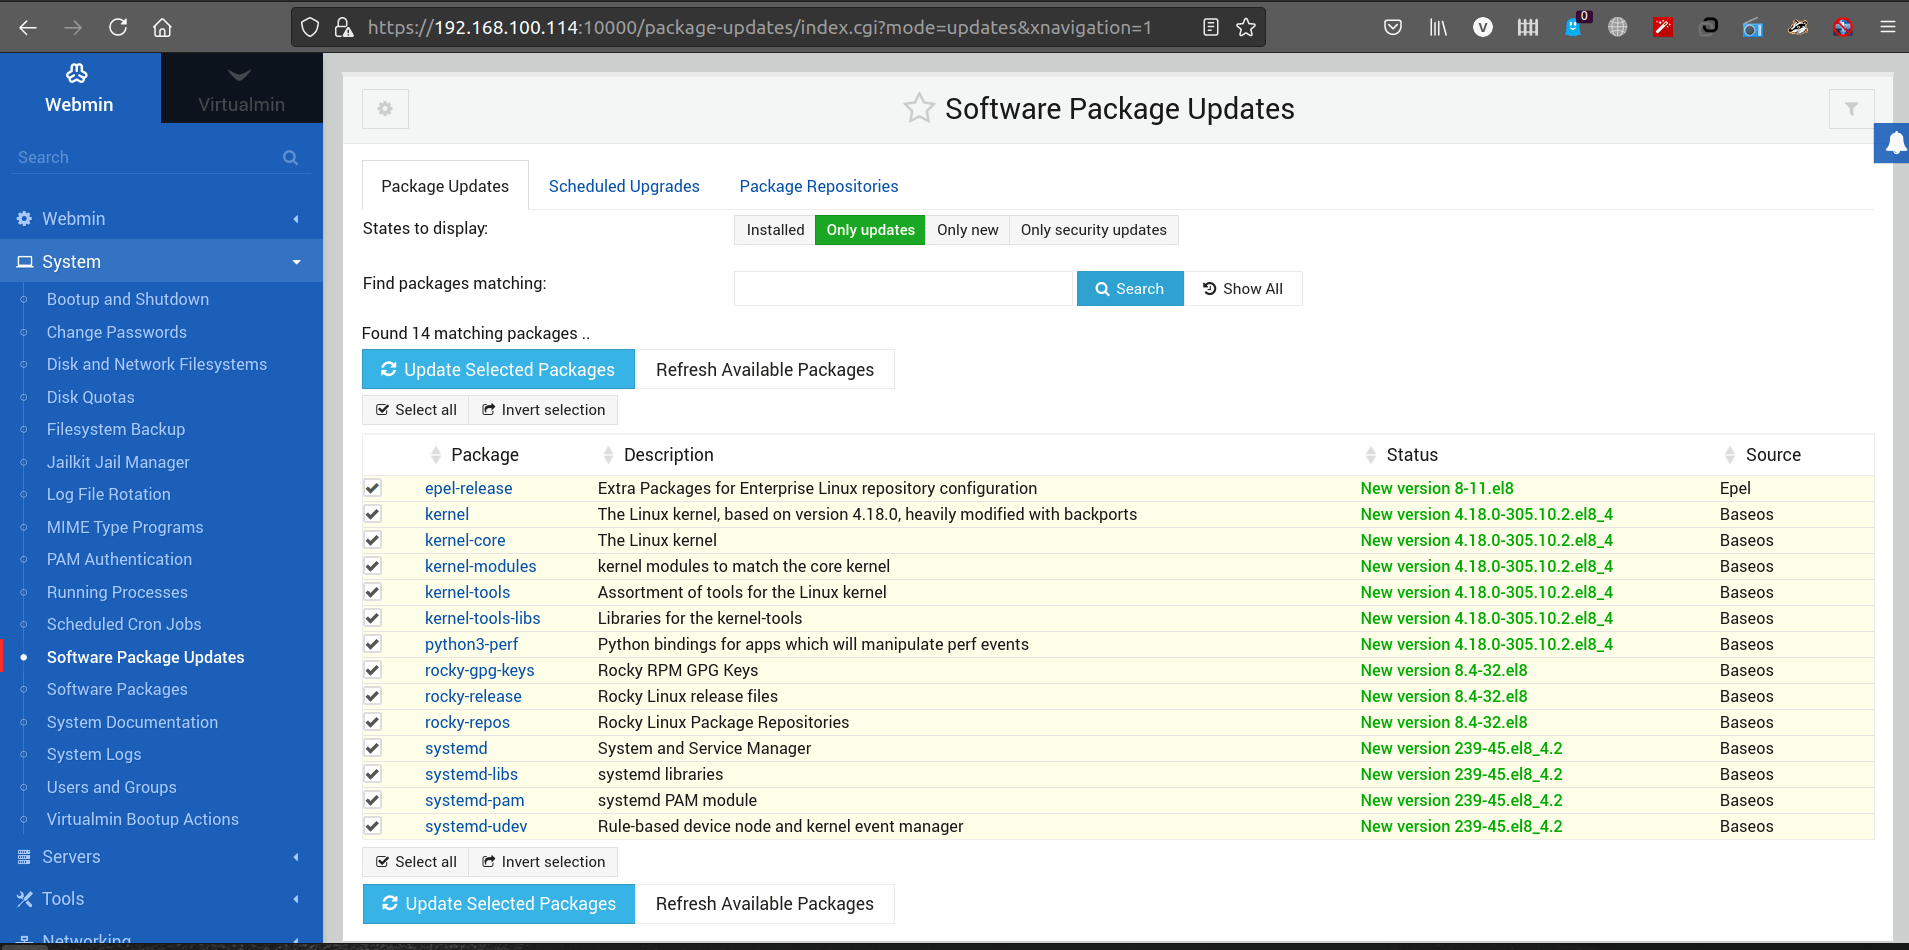
The Webmin tab is for server management where you can manage users, update the system, and even run the terminal on the browser.
We have successfully installed Virtualmin on Rocky Linux 8. You can now proceed to configure your virtualhosts for web hosting purposes.
